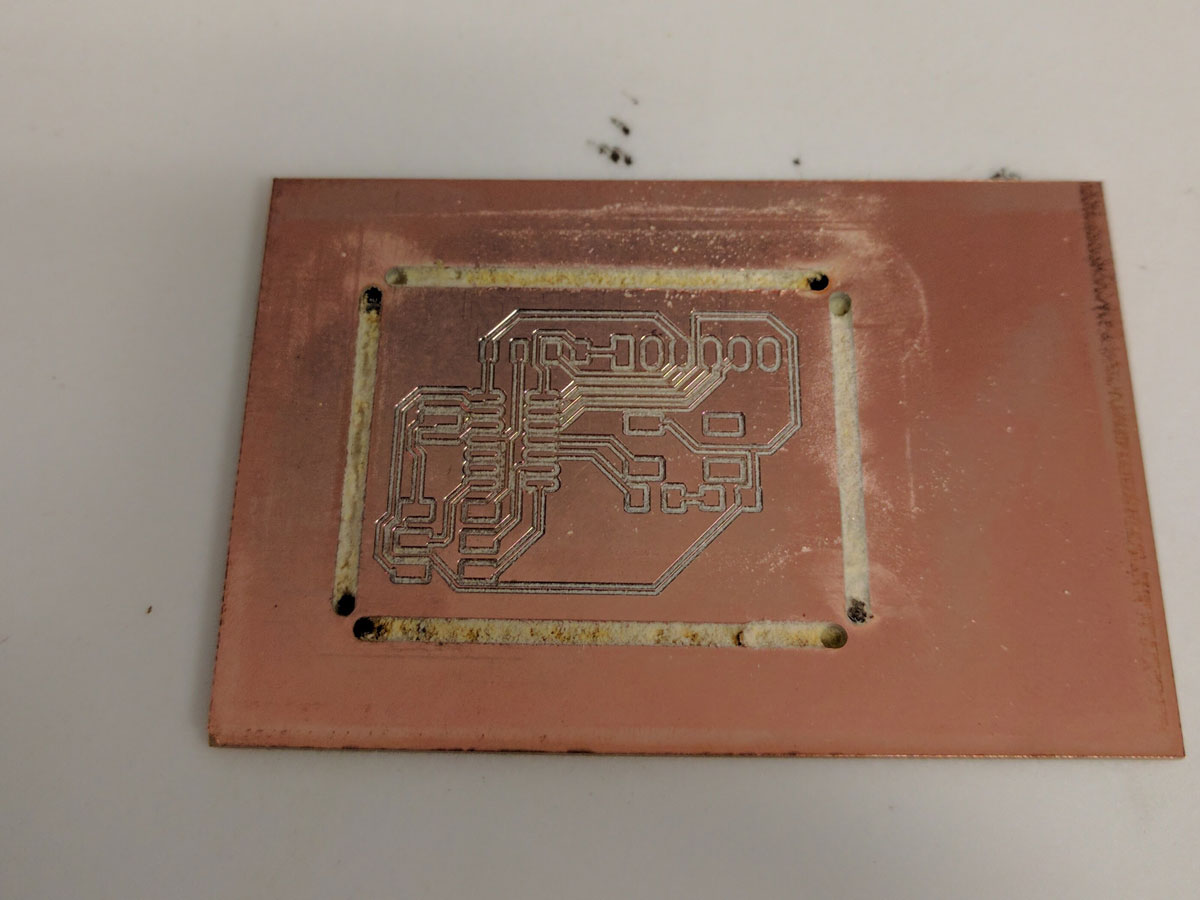
iLab Name: LPKF Mill
iLab Kiosk: BRK Packaging and Assembly Core
FIC: Dimitrios Peroulis
Owner: Mihailo Bradash
Location: BRK 2254 - Galley
Maximum Wafer Size:
Overview
General Description
Maximum PCB Overall Size: 230 X 330 mm
Maximum PCB Platable Size: 200 X 260 mm (for reference if through hole plating will be required)
Please Read this Before Requesting Training on this Tool
Notice 1:This tool produces bare copper boards only. The image to the right is an example board produced by an | |
Notice 2: Birck does not provide cutting tools to operate this tool. Before you can be trained on this tool, you will need Page 7 - Part Number 129103-1 - Starter Package - $450 (2020 pricing) See catalog link to the right for details and pricing options. All tool bits must be ordered with the distance rings. | |
| Notice 3: Due to ongoing issues with the LPKF mill, Birck has decided to move this tool to a "Super User" format of use. This essentially means each professor/group should select one student to be the user for the entire group and all fabrications at the tool should be completed by that user. The goal is to have that user on the tool frequently so they become, and maintain, proficiency at a level that will reduce potential damage to the tool due to operator errors. |
Ok, so I read that, and I don't think it's a good fit. Now what..?
| A simple google search for prototype PCB fabrication will turn up many options for online short run PCB services. Review their capabilities carefully as they do vary from service to service. Some offer same day turn around! |
Specifications
| Description | Value |
|---|---|
| Workplace noise level | 71 dB (A), without soundproof hood and dust extraction |
| Range of spindle speeds | Up to 100,000 rpm (variable) |
| X and Y feed rate | 150 mm/s |
| Drilling rate | 150 strokes per minute |
| Tool Change | Automatic |
| Tool Magazine | Up to 15 positions |
| Tool shank | 3.175 mm diameter (0.125 in) |
| Cutting depth adjustment | Automatic |
| Working area | 305 x 229 x 23 mm |
| Resolution(X/Y) | +/- 0.25 um (0.01 mil) |
| Repeatability | +/- 5 um (0.2 mil) |
| Minimum drill diameter | 0.2 mm |
Technology Overview
Sample Requirements and Preparation
Standard Operating Procedure
System start up
- Start the PC.
- Check that the switch on the dust extraction unit is set to the automatic position.
- Set the desired extraction power (75-100% depending on size of board)
- Open the cover of the Protomat S103 and set the main switch to the ON position.
- Close the cover.
- Start the CircuitPro software on the PC. A series of initialization steps will take place automatically. Once these complete, the Protomat S103 is ready to use.
- It is possible that the mill/drill head is equipped with a tool, used by a production process in the past, and mill cannot identify the current state during initialization. When CircuitPro is checking the tool status two things may occur:
- Tool status is known - the tool will be placed into the corresponding position of the tool magazine.
- Tool status is unknown - you will be prompted to select which tool is currently in the spindle (1-15, or none). Click OK.
- It is possible that the mill/drill head is equipped with a tool, used by a production process in the past, and mill cannot identify the current state during initialization. When CircuitPro is checking the tool status two things may occur:
Processing Gerber Files utilizing Circuit Pro
- Open CircuitPro template. File > New > select the appropriate template for your project.
- Press the import icon, or alternativley, File > Import.
- Hold down Ctrl while selecting all required layers for your project > click Open
- Change the "Layer/Template" column for each row, to map the data to the appropriate layer within CircuitPro. > press OK
- More about Gerber File Format and ODB++ File Format.
- Check settings on layers to make sure they are correct
- If NC drill layer is improperly displayed you may need to change the N digit from 4 to 3. This setting signifies how many zeros the software uses. The setting is normally either 2:4 or 2:3
- Click on the layer and review the overall dimensions for correctness. You may need to change from English units to metric depending on export options in the design software.
- Press OK and your design should be displayed on screen.
Board Production in Circuit Pro
System Shutdown
- Save the current CBF file
- Exit CircuitPro Software by clicking File > Exit.
- Open the cover of the Protomat S103 and set the main switch to the OFF position.
- Log off the PC.
Questions & Troubleshooting
Process Library

